
We asked the professional labels and producers who create the sample packs on our site to submit music production tips for beginners and advanced producers. The result is a goldmine of straight-forward music production advice which will help you create better mixes, slay writer's block, nail your track's arrangement and be more creative in your productions.
Find out how the producers behind some of the best sample packs out there use compression and EQ in their mixes, get that low-end Techno rumble, and take a minimal approach to mixing and arrangement to deliver a stunning mix every time.
So without further ado, here are our best music production tips and tricks.
Mixing Tips
1. W.A. Production - I use just a Limiter on my Master channel when I am working on a new production. I never load multiple effects there and then work on the project - that always causes issues in the mix and it damages the quality of your sound. On the other hand, adding a multiband compressor or a bit of EQ, as a final step - just to add "something extra" to the mix after it is fully prepared - that is what I enjoy the most.
2. Producer Loops - Take regular breaks. Your ear compensates for harsh frequencies and loudness after 15-30 minutes, so long sessions rarely result in good mixes. And avoid the temptation to mix loud!
3. Producer Loops - Pink noise is an excellent tool to get you in the right place levels wise. Bring all your faders down and play some pink noise. Bring each channel up until it's barely audible then mute it. Repeat until every channel is done and then unmute everything. It works surprisingly well.
4. Diginoiz - My philosophy of mixing is contained in 3 words – "less is more". I see many mixing engineers and producers using too much compression in their mixes, which usually kills their sound. I'm also a music producer, so for me, the most important thing is to choose the right sounds to begin with. Sounds that suit each other. If you choose your sounds properly, you only need gentle processing during the mixing stage to make it sound the best!
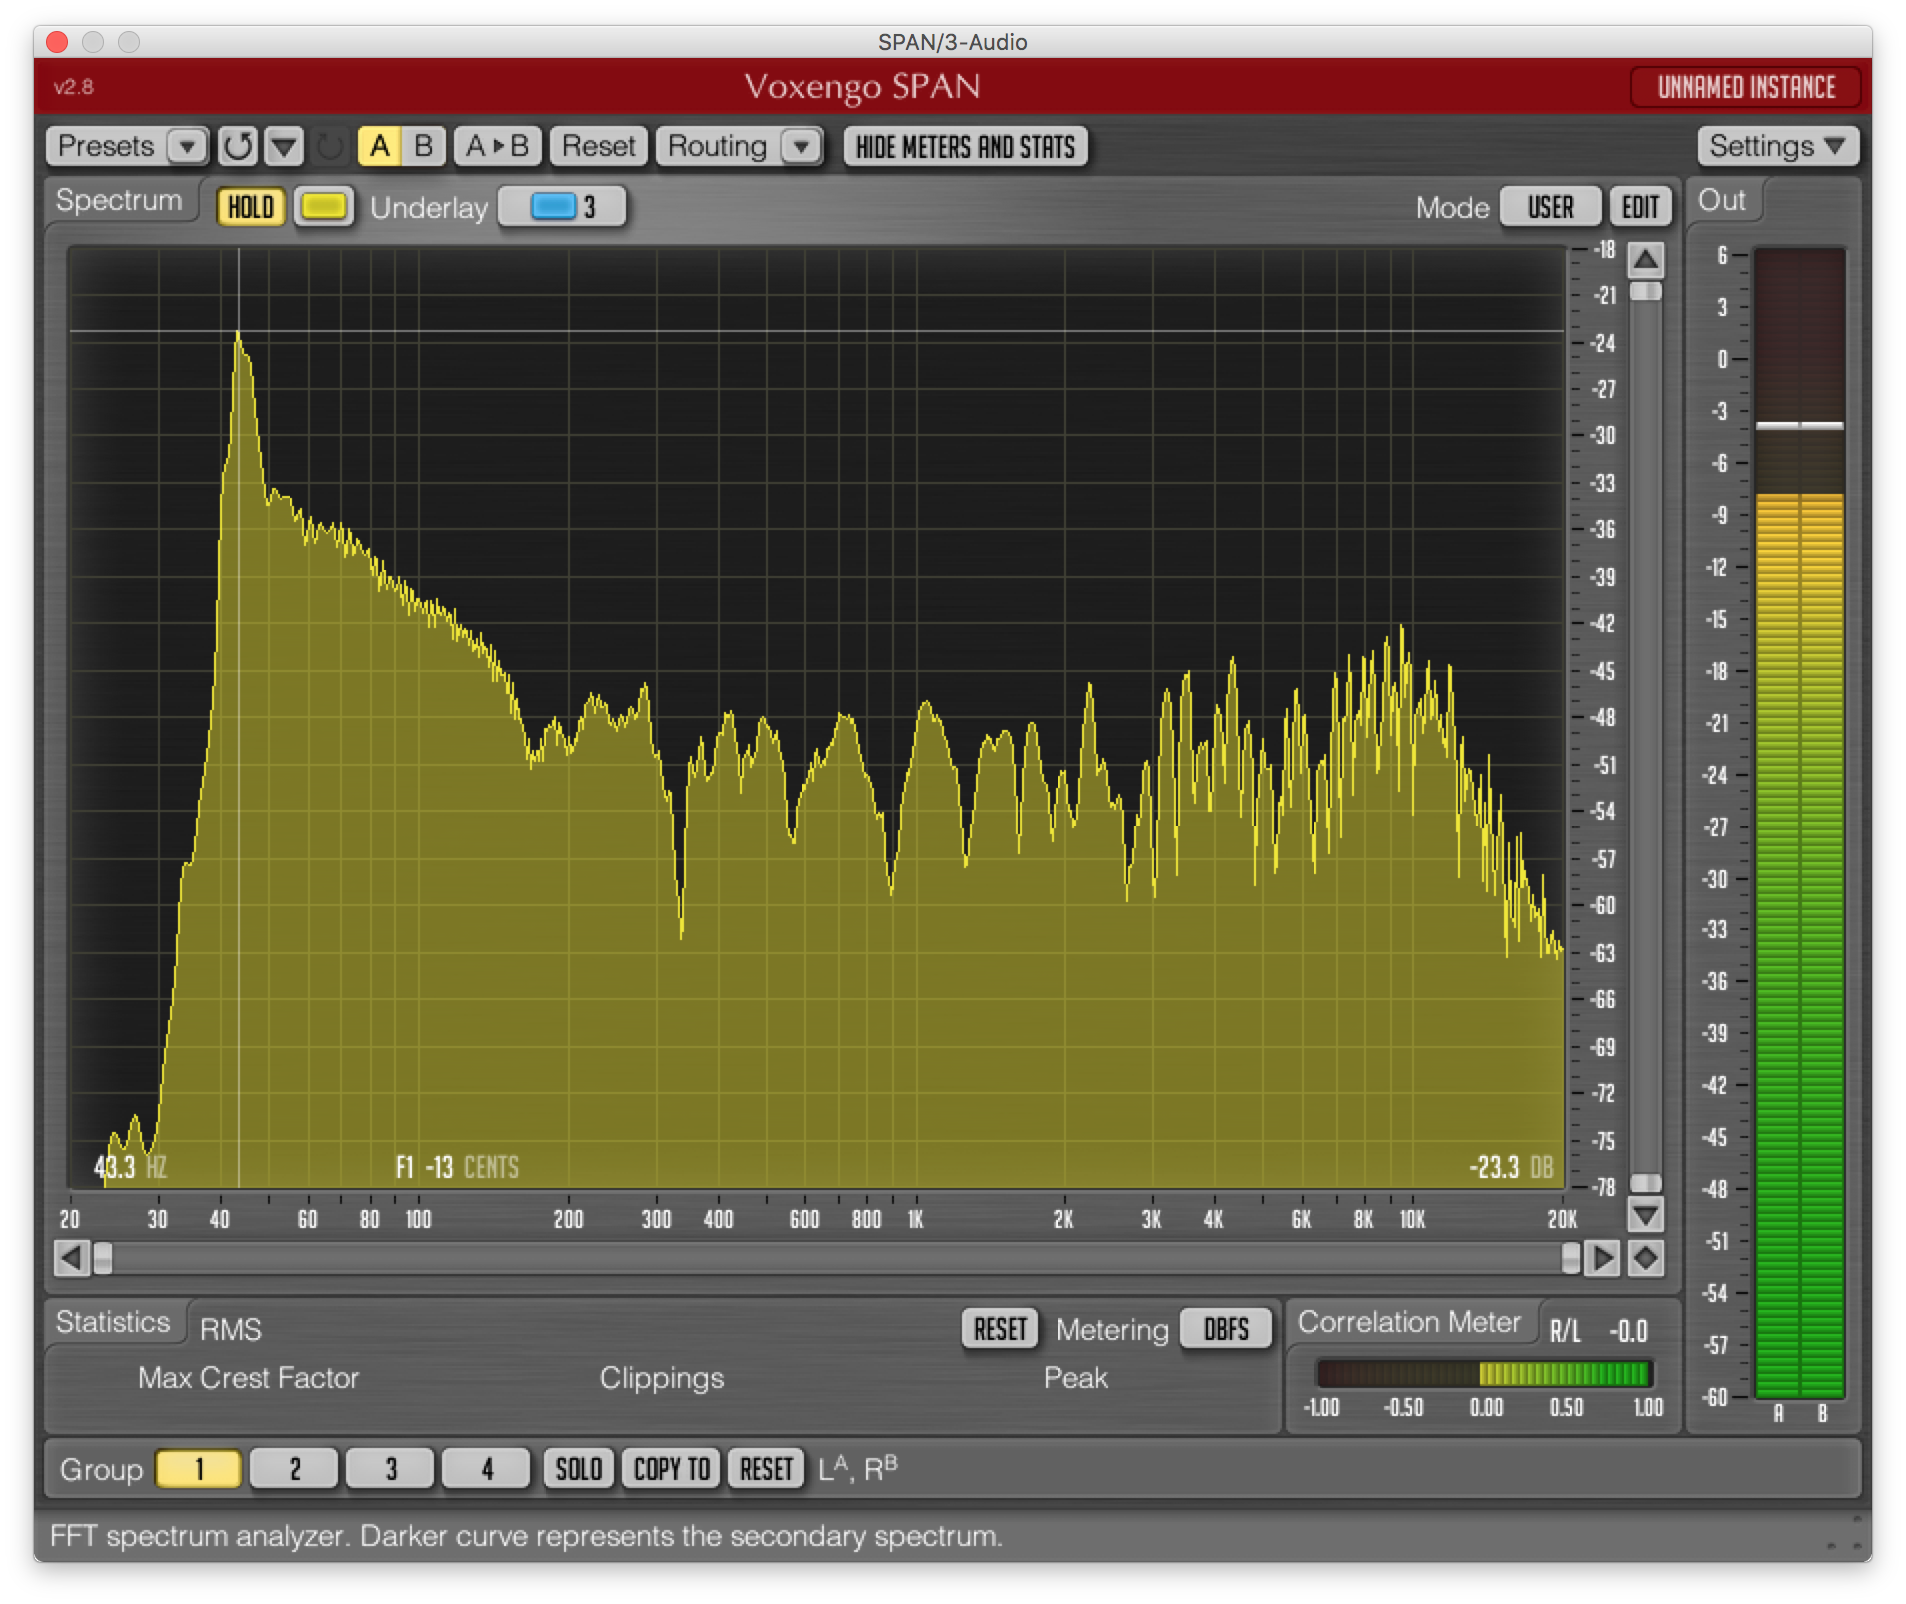
5. Producer Loops - Ensure your percussion is in tune with the key of your track by using a spectrum analyser to search for the most dominant frequency. First, load a Spectrum Analyzer such as Voxego Span (free) onto your channel and play the drum hit on a loop. Inside Voxengo Span, hit the HOLD button. The spectrum will freeze so you can move your cursor to the highest peak, where it will create a crosshair. Check the note at the bottom of the spectrum. You can then tune your percussion accordingly so it fits your track's key. As below...
 6. Producer Loops
 - The start to having a good sounding mix is the low end. In your track, the bass and the kick should be only the instruments present below 100Hz. Anything like vocals, synths, guitars, pianos, low cut them from about 140Hz and hear how the low end sounds much tighter. Even elements like vocals can occupy some real boomy, unwanted frequencies, so remove it all.
7. Producer Loops - Listen on a variety of devices. People consume music in a lot of different ways beyond just listening through headphones or good speakers, and phones/tablets tend to accentuate things that are too loud or quiet. Reference how your mixes sound commercial songs on the same devices.
8. Producer Loops - Don't forget that reverb plugins can add undesirable frequencies to your mix. Finish your plugin chain with an EQ to make sure your reverb hasn't added frequencies you previously attempted to EQ out, or send the channel to a bus with your desired EQ settings if you want to apply the same EQ to all similar channels (e.g. all hi-hats, risers and crashes).
WORKFLOW & ARRANGING YOUR MIX
9. Producer Loops - Struggling with arrangement? Pick a song which you think has a great structure to it and load it into your DAW in a new track. Pick a song that is similar to your own production and sync up the tempo to your project. Then, look at how your example track builds. For example, if they add a clap sample after four bars, you introduce your own clap sample after four bars as well. Keep following your example track's development to build your arrangement. If you do this often enough, you'll start to get a feel of what makes a good arrangement.
10. Producer Loops - Most producers colour code the channels on their mix to make their project more user-friendly but the ultimate time-saving tip is to always use the same colour scheme in each project. If your vocals are always in blue and your kick is always in orange, you'll be able to find those elements quickly, even when opening an old project. Similarly, if your FX channels are always at the bottom and your kick is always at the top, it will also save you time.
11. Martin Sampleware - When working with a lot of FX samples, I use Ableton's Drum Rack, rather than lay the samples individually along channels. As a Drum Rack can have up to 128 pads, it keeps all the samples in one place, cleaning up my workflow. It's easy to turn the velocity up or down and stack effects, without having to create a new track. I use a couple of Drum Racks, one for high effects like sweeps and another for lows, like sub drops or drones. I then apply the appropriate EQ, reverb, delay, sidechaining etc. to each Rack. Of course, you can also apply individual effects to each drum pad, which will then be affected by the Rack processing. You might not want sidechaining on your entire Rack, for example.
12. EDM Sound Productions - To avoid writer's block, go out and have fun! As a general rule for music producers, you'll get stuck if you lock yourself up in your studio. Your creativity will hit a roadblock at some point! Boost your creativity and get inspired by going out to some music events, go to festivals, go see your favourite DJ playing in your hometown, try to enjoy the music for a moment. You will see how quickly your inspiration comes back. When you get back into the studio, try to relive the moments you had on the dancefloor and imagine how your music would sound and how people around you would react to your track.
13. Producer Loops - The musical notes you choose are half the mix. Busy chords and cluttered arrangements can't be mixed to sound better or clearer. Start with the right note choice and do as much as you can with as little as you can.
Compression Tips
13. Strategic Audio - Oftentimes, to get an instrument or vocal to cut through the mix, I use parallel compression. I like to send, for example, a kick drum to an auxiliary channel and use some heavy compression and EQ on it. I'll then blend that in with the original, unprocessed kick drum - though sometimes the original kick drum can have some EQ on it as well. It depends on what sound you are going for.
14. MAGIX - Using sidechain compression with kick and bass tracks is a well-known technique in many music genres nowadays. What about that snare, though? Using a snare track as sidechain input to compress and "duck" your whole song might be a piece of advice not so commonly known: Route all tracks except your snare drum tracks to a bus channel, insert a master compressor with sidechain functionality in that bus channel and feed a snare signal into the compressor's sidechain input. Experiment with the threshold and ratio and you will hear your snare punch harder than ever before!
15. The Life Productions - Gel your drums together using bus compression and saturation. Send all of your drums to a bus with a mild compression setting and/or a tape saturation plugin. Adjust each channel to send different levels to the bus compressor to taste. For instance, you might want more of the bus compression/saturation on your kick and snare than on your percussion sounds.
16. Producer Loops - Compression isn't the only audio effect which will help you achieve your desired outcome of getting sounds to cut through the mix. For example, using a distortion plugin on shaker samples can help them cut through the mix
and sound more interesting, without sucking the life out of the samples in the way that compression sometimes can.
Music Production Tips
17. Temporal Geometry - Create an endless variety of textures with an arpeggiator. At high speeds (above 1/32th notes) an arpeggiator is an excellent tool to create intricate textures, especially if it includes velocity and length controls. Simply point the arpeggiator to some instrument such as a sampler or a synth and experiment with the settings of both the arpeggiator and the instrument. The best settings to focus on the arpeggiator for this kind of sounds are the velocity, the gate and the length, as they contribute rhythmic and dynamic irregularity, complexity and unpredictability to the sound, making it more organic and realistic. Another way to make the textures more interesting and evolving is to automate or modulate the sample start parameter of a sampler or the wave-table position in the case of a synth, so each time the arpeggiator hits the instrument, a different part of the sound is triggered. You can also switch to the free mode of the sync function of the arpeggiator to make its speed conform to hertz instead of musical measures in cases you need a more experimental and organic type of sound design.
Editor's Note: We LOVE this tip!!
18. The Audio Bar - A great method to add more impact to your
EDM drop is by using Mid-Side EQ. Group your drop synths in one channel and high pass the low frequencies with Mid EQ. This trick creates space for your kick and bass without making your leads sound thin.
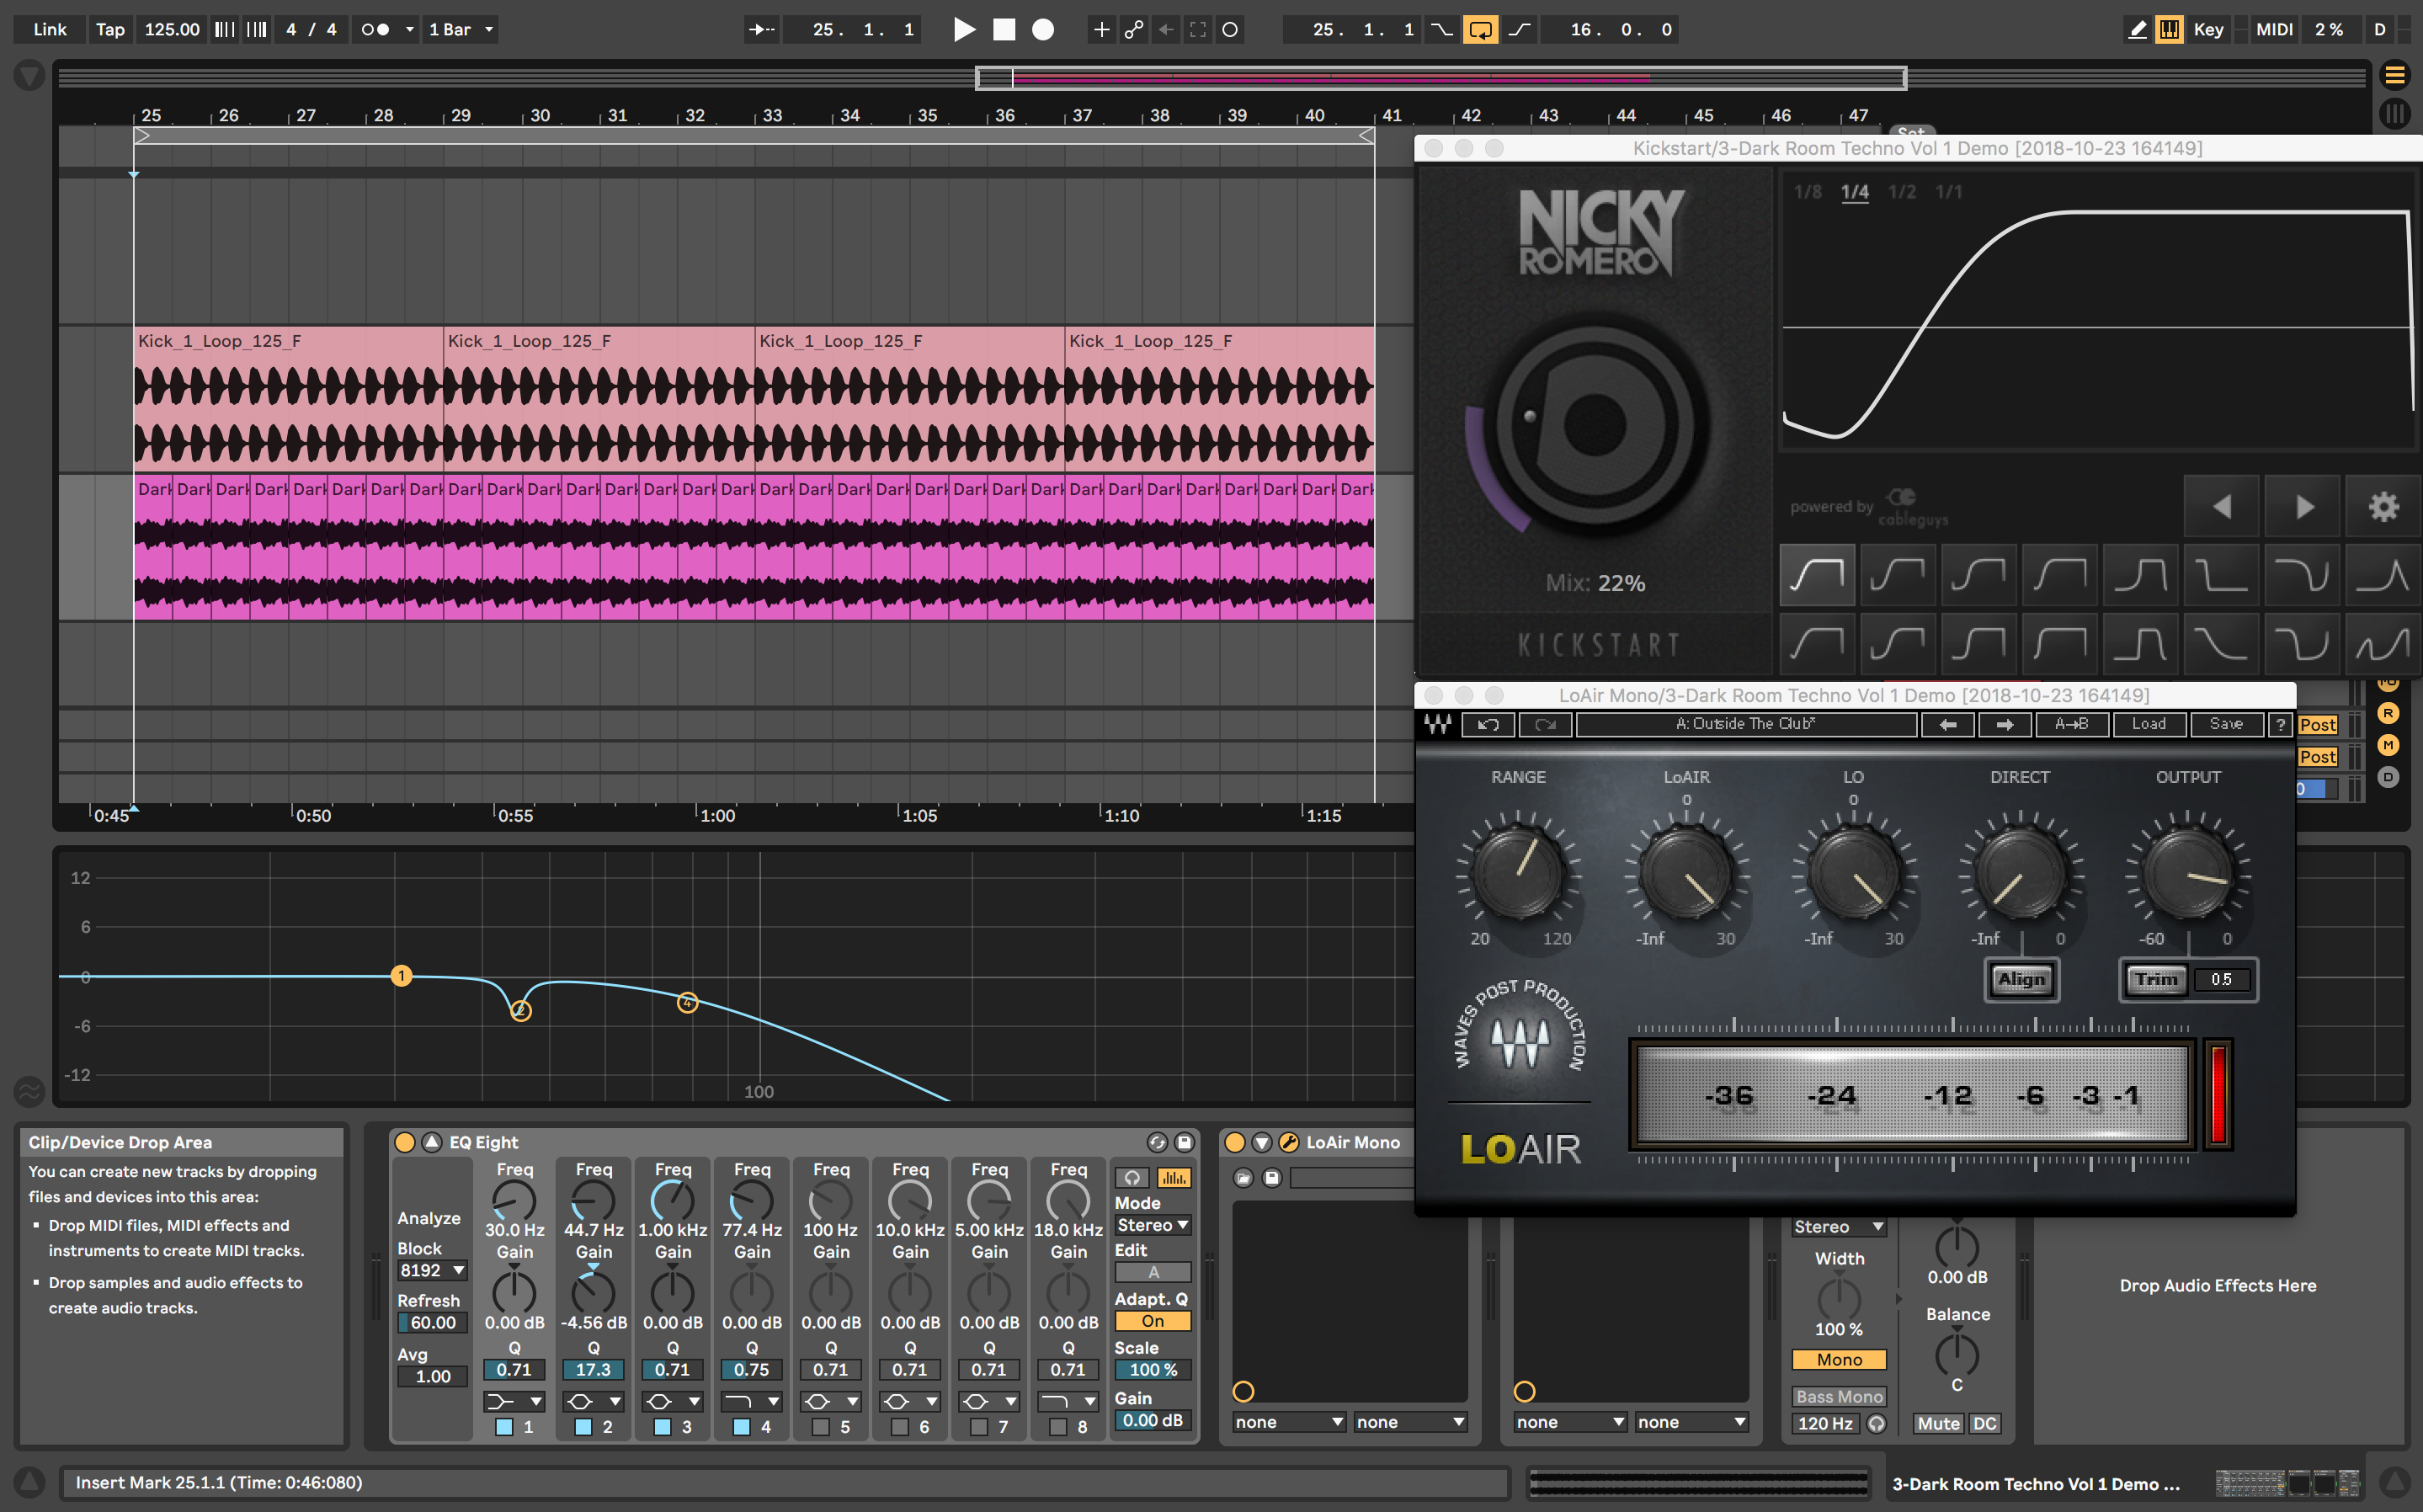
19. Producer Loops - Get that low end,
Techno rumble by looping a short sample of a previous mix or a Construction Kit demo which is in the key of your track. Low pass to allow only frequencies below 200Hz then use EQ to cut off a few decibels where your kick peaks (check this using EQ or a spectrum analyzer on your kick channel). A further enhancement is to add in some sub-harmonics. Waves Lo-Air is particularly good for this, especially the "Outside The Club" preset. Light sidechaining should then be applied to ensure your kick's transient isn't hampered much. Don't forget to ensure the channel plays in mono and then dip the channel's volume significantly to get that almost subliminal rumble.
 20. Producer Loops
 - When creating a
Future Bass or
Future Pop lead from vocal samples, don't forget to tune the end result, particularly if you've made your lead from lots of different vocals. Before you add any reverb or delay, run your finished dry vocal lead through an instance of Melodyne (or your chosen vocal tuner) to put each vocal sample snippet in tune. You'll find your vocal synth sits in the mix so much better when it's fully in tune, and you might also get some melodic ideas by shifting the pitch of the different vocal sample snippets, if you use Melodyne.
Whether you're a beginner looking for tips for new music producers or a more advanced sample pack user who just wants a few music production tips and tricks to keep the ideas flowing, we hope you've found this list useful. We'll keep adding to the list as and when we receive new music production tips, so check back often!


")
")
Share this